THIS POST MAY CONTAIN AFFILIATE LINKS. PLEASE SEE THE DISCLOSURE POLICIES FOR DETAILS.
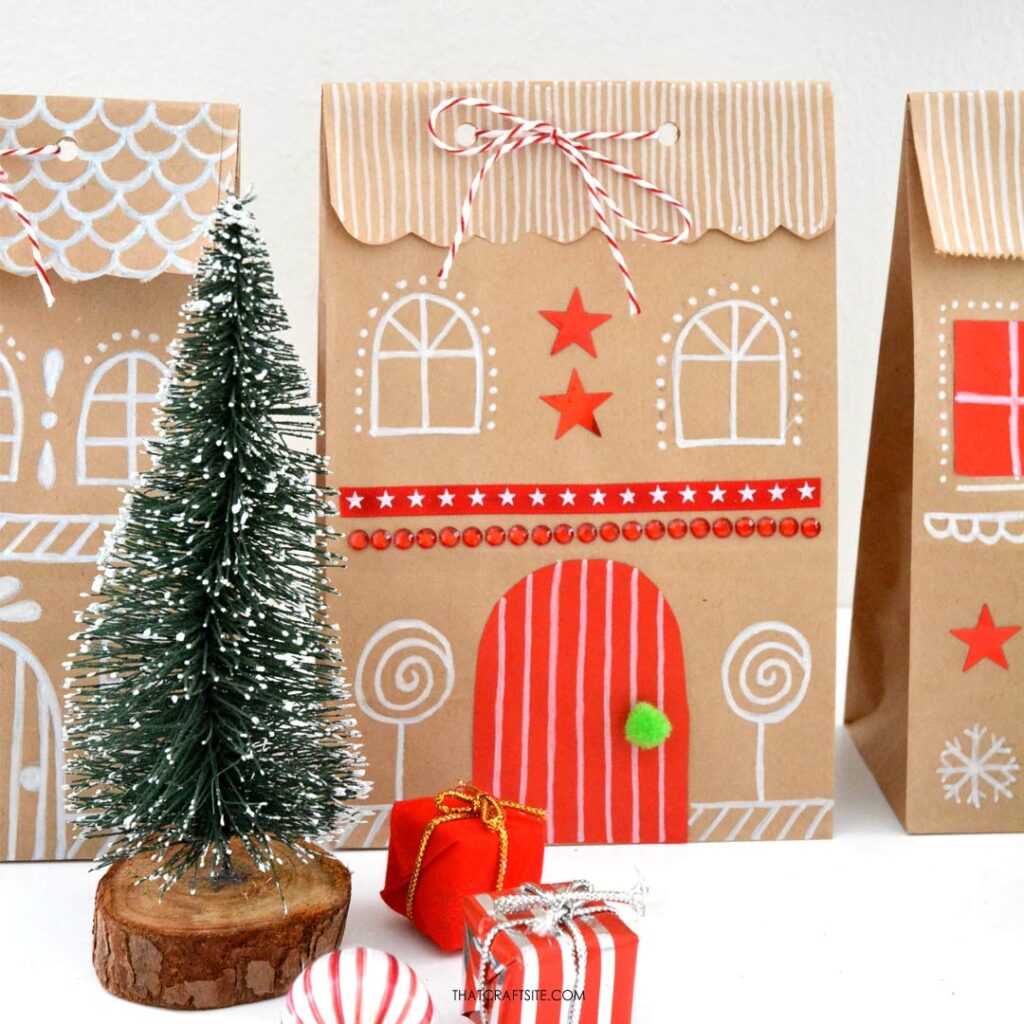
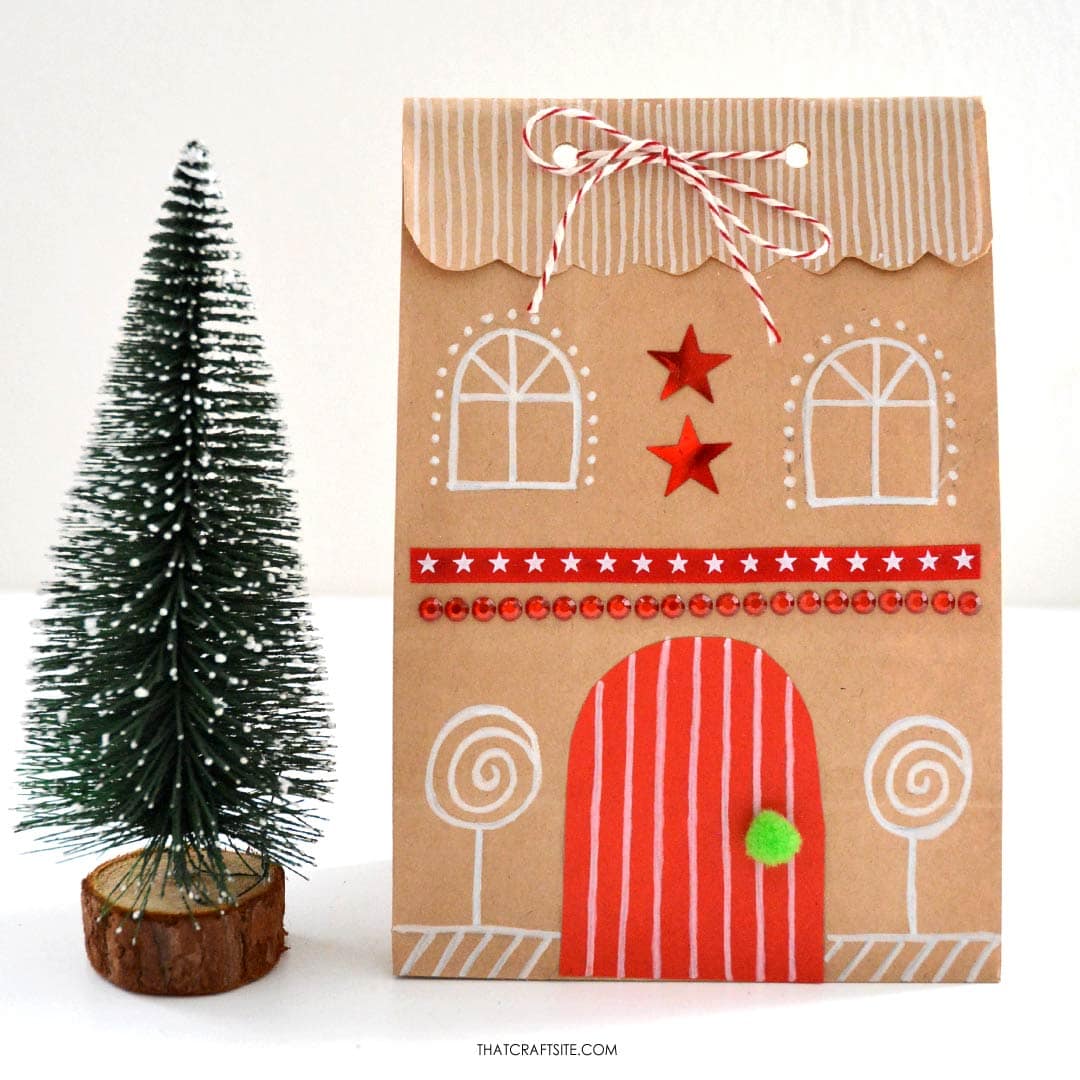
Looking for a fun and creative holiday craft? Brown paper bag gingerbread houses are simple to make and perfect for Christmas decorations. They double as charming gift bags for holiday cookies or small presents!
A Fun Craft for the Whole Family
This craft is easy enough for kids to join in, making it a great activity for family time during the holidays. Kids will love drawing doors and windows, cutting out shapes, and adding their creative touches to these adorable houses. Plus, you can make multiples to create an entire gingerbread village or a unique advent calendar.

If there are any folds or wrinkles in your brown paper bag, carefully iron them out. Cover the bag with a thin towel and iron it on the lowest setting. Check the bag while you go to see if the creases have smoothed out already and you can stop ironing.

Continue below for the printable step-by-step instructions on how to make these gingerbread house gift bags!


DIY Gingerbread House Gift Bag
Decorate regular brown paper bags with white marker and paper scraps to turn them into cute gingerbread house gift bags. Simply follow this easy step-by-step tutorial.
Materials
- 1 Brown paper lunch bag (block bottom)
- [Bakers twine or string ]
- Small embellishments (optional)
- Tissue paper (optional)
Tools
- Pencil
- White marker
- Hole puncher
- Scissors
Instructions
- Gather all your tools and materials.


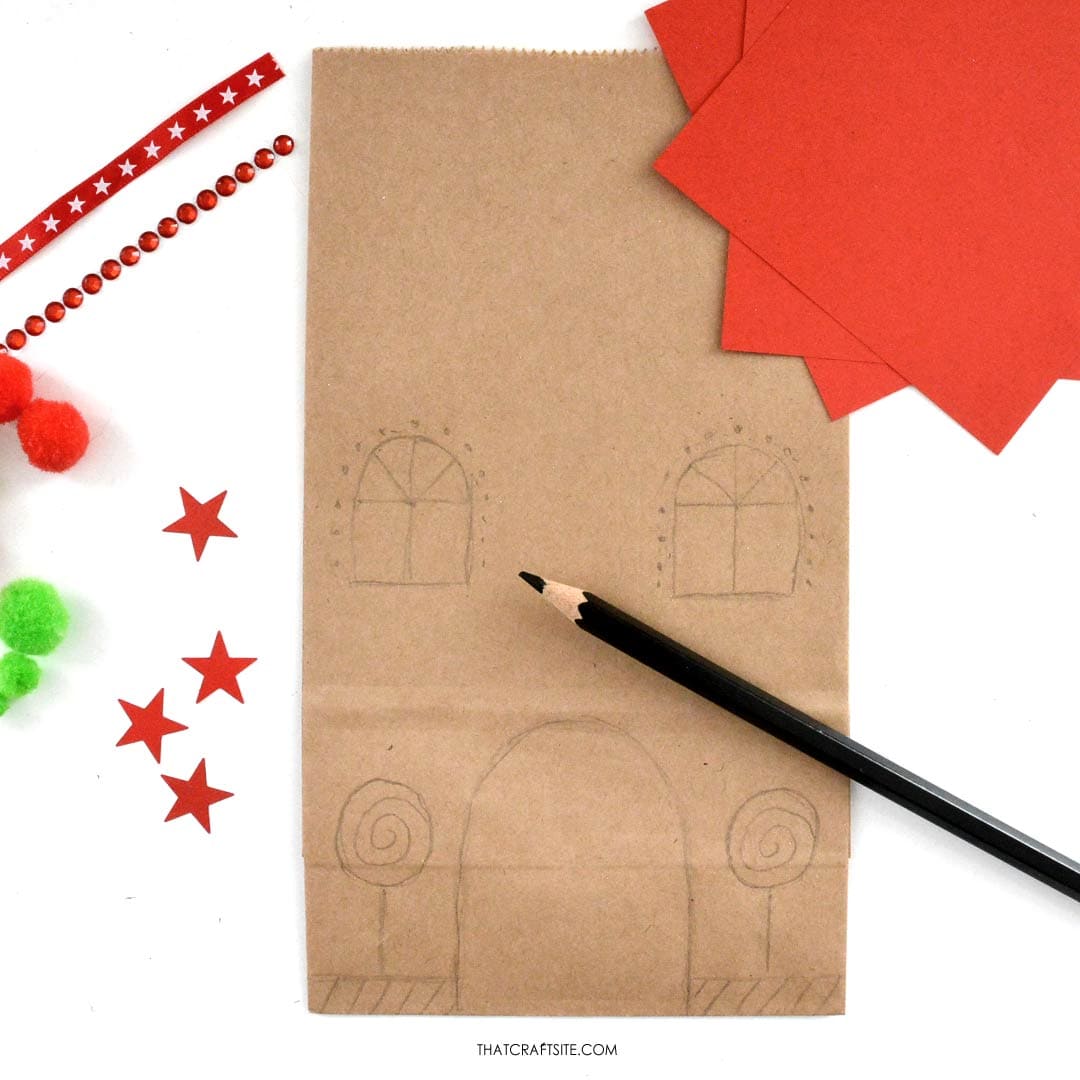
- Lightly sketch your design on the bag using a pencil so you can erase any mistakes. Begin by drawing a door centered at the bottom of the bag and work outward. Leave some space at the top for the roof.
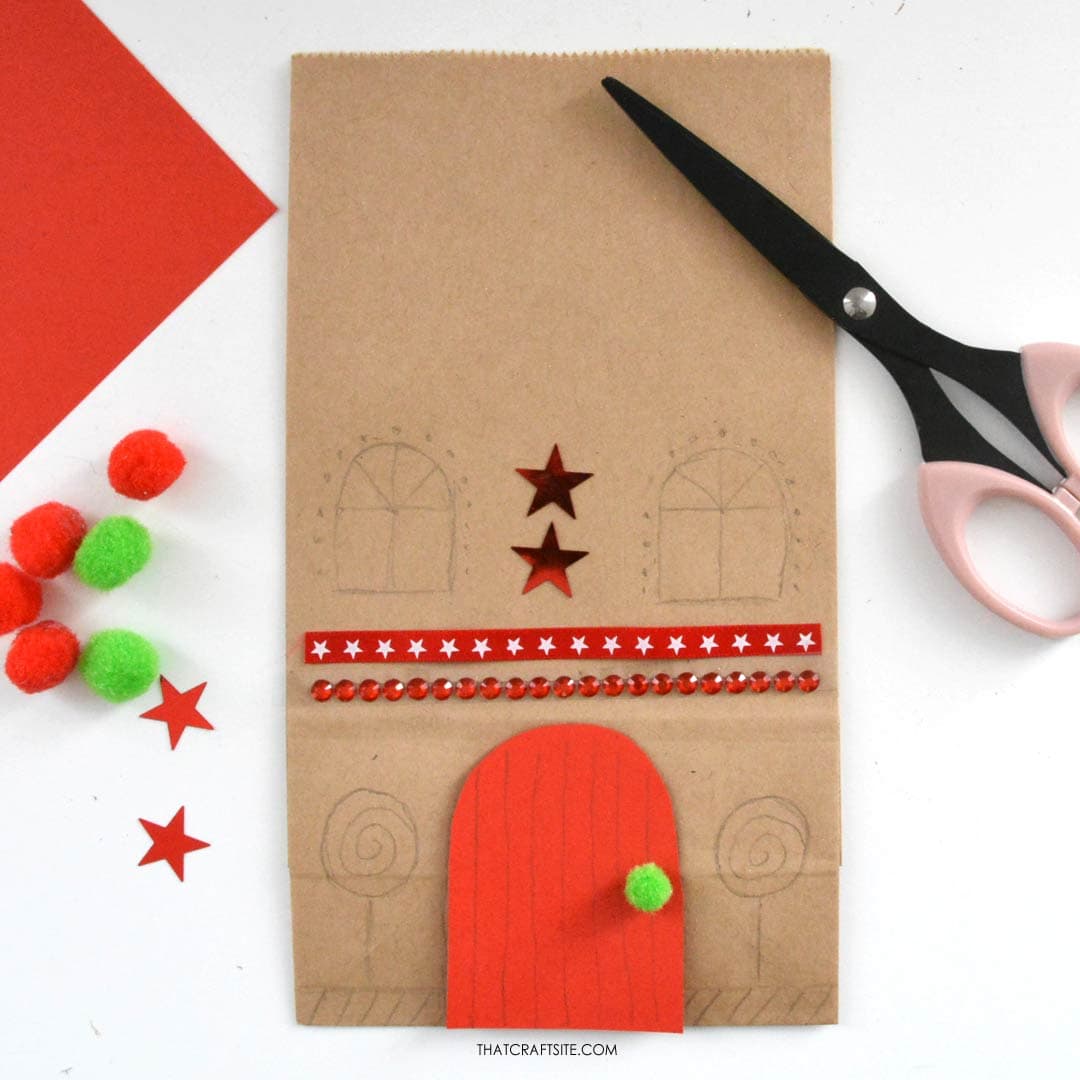
- Lay out your paper cutouts and any embellishments on the bag without gluing them. Experiment with different placements until you’re happy with the design. Use colored paper to make details like the door and windows.
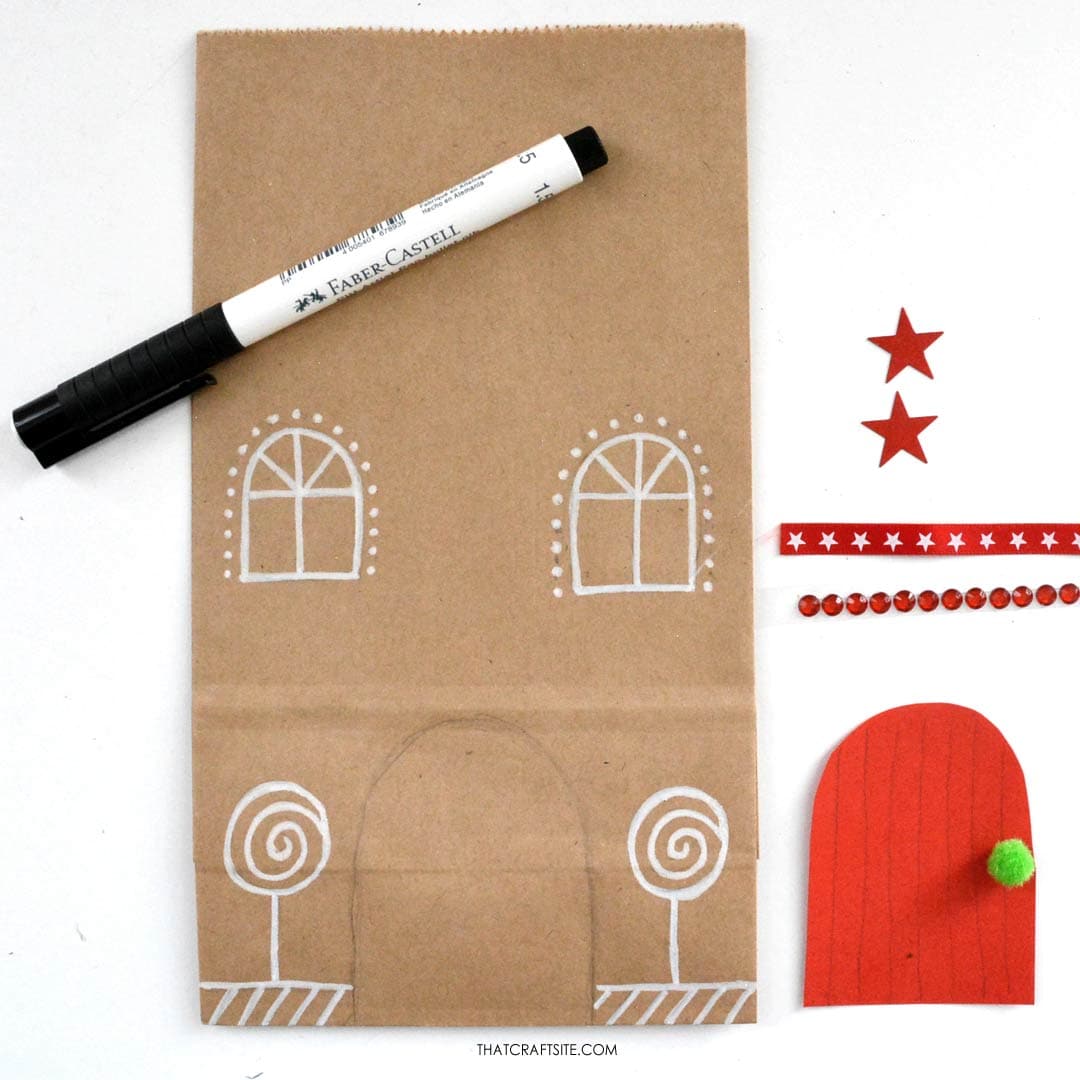
- Set the decorations aside, but keep track of their placement. Trace over your pencil sketch with a white marker to give the design a "frosted" look. Allow the ink to dry completely.
- Glue the paper cutouts and embellishments onto the bag in their planned positions.

- Fold the top of the bag down to just above the windows to form the roof. Trim the edge of the fold into a scalloped shape, and add details to the roof using the white marker.

- Set the decorated bag upright and place your gift inside. If the gift is small, add tissue paper to fill the space. Punch two holes through the folded roof, thread a piece of string or baker’s twine through the holes, and tie it into a bow to secure the bag.
Notes
You can keep it simple by drawing all the details with a white marker, or go all out with embellishments like mini pom-poms, ribbon, or colorful paper for doors and windows. The possibilities are endless, so have fun experimenting!
Looking for more unique and creative gift wrapping ideas?
Why not make your own DIY paper nutcracker gift wrap? Perfect if you need to wrap a cylinder-shaped present. Or a cute honeycomb snowman gift wrap.
If you have some felt and more ribbons, make a gorgeous felt and ribbon ornament gift wrap. Simply follow the easy steps described. Brown paper bags are ideal for small items. Decorate them as Christmas gingerbread house gift bags to make them more special!